May 27, 2026 🍏
Banner Image
Cottage Bakery

How to Price Baked Goods for Profit (Cottage Bakery Guide)

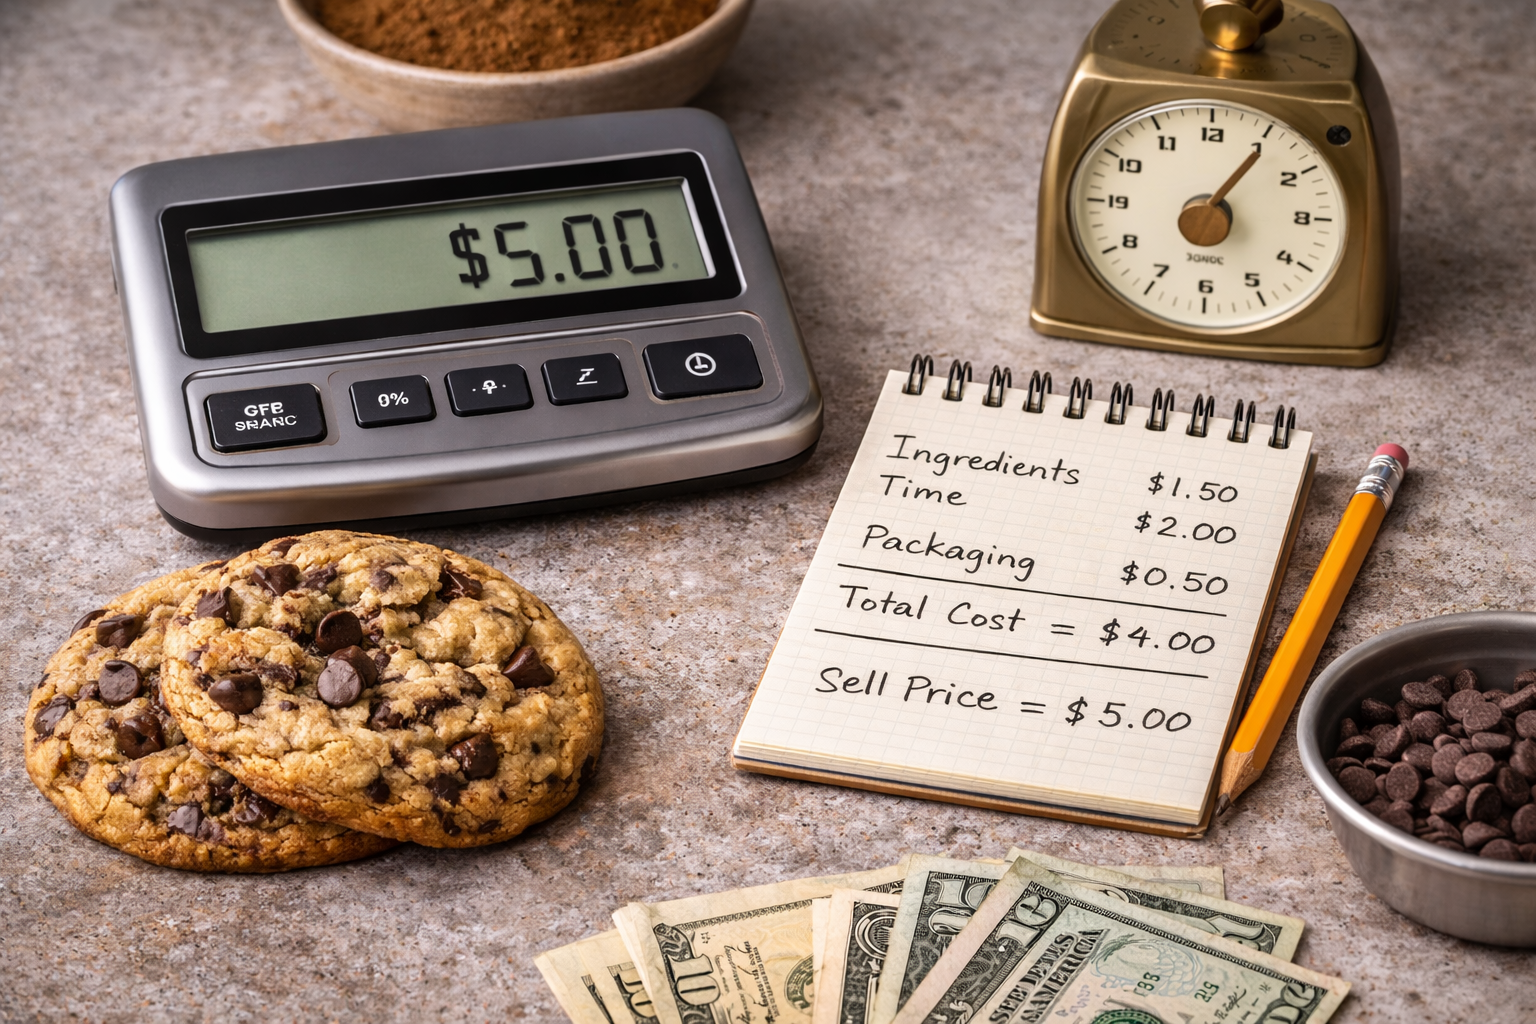
Chocolate chip cookies next to a digital scale, handwritten pricing notes, and cash, showing how to price baked goods for a home bakery.

Pricing your baked goods is one of the hardest parts of starting a cottage bakery.

Not because it’s complicated—but because it feels personal.

You don’t want to charge too much.

You don’t want to scare people away.

And at the same time… you don’t want to burn out making $2 cookies.

If you’ve ever thought,

“I have no idea what to charge”

you’re not alone.

The good news? There is a way to price your baked goods that actually makes sense—and doesn’t leave you second guessing every order.

Here’s the Quick List

To price baked goods:

• calculate your ingredient cost

• factor in your time

• include packaging and overhead

• add profit on top

Pricing isn’t just covering costs—it’s making your business sustainable.

Why Pricing Feels So Hard

Most people start here:

👉 “What are other people charging?”

But here’s the problem:

• their costs aren’t your costs

• their skill level isn’t your skill level

• their business setup isn’t your setup

Copying prices is one of the fastest ways to undercharge.

What Goes Into Your Pricing?

Before you pick a number, you need to understand what you’re actually charging for.


1. Ingredients

This is your base cost.

• butter

• flour

• sugar

• chocolate

• eggs

Even small differences here matter.

2. Your Time

This is the one most people skip.

Your time includes:

• mixing

• scooping

• baking

• packaging

• cleanup

If you don’t pay yourself, your business won’t last.

3. Packaging

Don’t forget:

• boxes

• bags

• labels

It adds up quickly.

4. Overhead

Even at home, you have costs:

• electricity

• supplies

• equipment wear

You don’t need to overcomplicate this—but it should be included.

A Simple Pricing Formula (Beginner-Friendly)

Don’t overthink this. Start simple:

(Ingredients + Packaging + Overhead + Time) = Base Cost

Then:

👉 Add profit on top

Example: Pricing a Cookie

Let’s keep this realistic.

Say one cookie costs:

• ingredients: $1.00

• packaging: $0.30

• overhead: $0.20

• time: $1.50

Total cost:

👉 $3.00 per cookie

If you sell it for $3.00… you’re just breaking even.

To actually make money, you need to price above that.

Example:

👉 $4.50–$5.00 per cookie

Now you’re:

✔ covering costs

✔ paying yourself

✔ making a profit

Common Pricing Mistakes

Undercharging

This is the biggest one.

If your pricing doesn’t cover your time, it’s not a business—it’s a very expensive hobby.

Pricing Based on Fear

Lowering your prices because you’re worried people won’t buy usually attracts the wrong customers.

People who value quality expect to pay for it.

Copying Other Bakers

You don’t know their costs, margins, or goals.

Your pricing should reflect your business.

Forgetting to Adjust

Ingredient prices change.

Your skills improve.

Your pricing should evolve too.

How to Raise Your Prices

Raising prices feels scary—but it’s normal.

Start here:

• make small adjustments

• improve your product presentation

• communicate value (size, quality, ingredients)

Most people won’t question it as much as you think.

What If People Won’t Pay Your Prices?

This is a real fear—but here’s the truth:

Not everyone is your customer.

You’re not trying to compete with grocery store cookies.

You’re offering:

• homemade

• high quality

• bakery-style products

The right customers will see the value.

Pricing for Growth

As your business grows:

• your demand increases

• your efficiency improves

• your brand gets stronger

Your prices should grow with you.

What Comes Next?

Once you understand pricing, the next step is making sure you have the right tools and setup to stay consistent.

👉 Next: What You Actually Need to Start a Cottage Bakery

Pricing your baked goods doesn’t have to be perfect.

It just needs to:

✔ cover your costs

✔ pay you for your time

✔ allow you to keep going

Because at the end of the day, the goal isn’t just to sell cookies.

It’s to build something that actually works for you.

And that starts with pricing them right. 🍪

How to Start a Cottage Bakery (Step-by-Step for Beginners)

Small “For Sale” sign on a kitchen counter surrounded by baking ingredients, packaging supplies, and a stand mixer, representing a home cottage bakery setup.

At some point, “you should sell these” starts to stick.

Maybe it was after you brought cookies to a party.

Maybe it was friends asking you to make more.

Maybe it was that moment you realized… these are actually really good.

And then the next thought hits:

Okay… but how do I actually start?

Starting a cottage bakery can feel overwhelming at first, but it doesn’t have to be complicated. You don’t need a storefront, a huge budget, or everything figured out.

You just need a clear starting point.

The Short Answer: How to Start a Cottage Bakery

To start a cottage bakery:

• check your state’s cottage food laws

• decide what you want to sell

• test and refine your recipes

• price your products for profit

• set up a simple way to take orders

• start selling locally

You can build and grow from there.

What Is a Cottage Bakery?

A cottage bakery is a home-based food business that allows you to sell certain baked goods made in your own kitchen.

Most cottage food laws allow you to sell:

• cookies

• brownies

• breads

• cakes (non-perishable or shelf-stable)

Each state has its own rules, but the goal is the same:

👉 make it possible to start small from home

Step 1: Check Your State Laws First

Before anything else, look up your state’s cottage food laws.

This tells you:

• what you’re allowed to sell

• where you can sell (home pickup, markets, etc.)

• labeling requirements

• income limits (if any)

Don’t skip this step—it saves you headaches later.

Step 2: Decide What You Want to Sell

Start simple.

You do not need a full bakery menu.

Pick 2–4 items you can do really well.

Examples:

• chocolate chip cookies

• brownies

• one or two specialty flavors

If you’re here, cookies are a perfect starting point:

✔ easy to batch

✔ high demand

✔ great profit potential

Step 3: Test and Refine Your Recipes

This is where your baking skills matter most.

Before selling anything, make sure your recipes are:

• consistent

• repeatable

• reliable

Ask yourself:

Can I bake this the same way every time?

Does it hold up after a few hours or a day?

Would I feel confident selling this?

Consistency matters more than perfection.

Step 4: Price Your Products (Without Guessing)

This is where a lot of people get stuck.

Pricing isn’t just picking a number—it’s making sure you’re covering:

• ingredients

• your time

• packaging

• overhead

If you underprice, you’ll burn out fast.

👉 Don’t worry about perfect pricing right now—we’ll break this down in another post.

Step 5: Set Up a Simple Way to Take Orders

You don’t need a full website right away.

Start simple.

Options:

• direct messages (Instagram/Facebook)

• a basic order form

• Square or similar platforms

The goal is:

👉 make it easy for people to say yes

Step 6: Start Selling Locally

You don’t need a big launch.

Start small.

• friends and family

• local community groups

• neighborhood apps

• small vendor events

Your first few sales are about:

✔ learning

✔ building confidence

✔ getting feedback

What You Actually Need to Start

Keep this simple—you probably already have most of it.

Basics:

• mixing bowls

• baking sheets

• measuring tools or a scale

• oven (no upgrades needed yet)

You don’t need a perfect setup to start.

You just need a working setup.

Common Mistakes to Avoid

Trying to Do Too Much

Start small. A focused menu is easier to manage and more consistent.

Underpricing Your Products

If you’re not covering your costs and time, it’s not sustainable.

Waiting Until Everything Is Perfect

You will learn more from your first 10 orders than months of planning.

Not Being Consistent

Consistency builds trust—and repeat customers.

What Comes Next?

Once you’ve decided to start, the next steps are:

👉 learning how to price your products

👉 choosing the right tools and setup

👉 refining your menu

If you’re not sure how to price your baked goods, that’s the next thing to figure out.

Let’s Wrap This Up!

Starting a cottage bakery doesn’t require perfection.

It doesn’t require a huge investment.

And it definitely doesn’t require having everything figured out.

It starts with something much simpler:

👉 deciding to take what you already love doing and seeing where it can go

You can figure the rest out step by step.

And honestly?

That’s the best way to do it. 🍪

How to Bake Thick Cookies (Bakery Style)

thick chocolate chip cookies

If you’ve ever tried to make thick, bakery-style cookies at home, you know how frustrating it can be when they spread into flat cookies instead.

You start with a scoop of dough that looks perfect… and then it melts into a thin cookie in the oven.

The good news is thick cookies aren’t just luck. They come down to a few specific techniques that control how your dough behaves as it bakes.

Once you understand what causes cookies to spread, you can start controlling the outcome and consistently bake thick, soft cookies at home.

The Short Answer: How to Bake Thick Cookies

To bake thick cookies:

  • use cool or cold butter
  • chill your dough before baking
  • measure flour correctly
  • use larger dough balls
  • bake on cool pans

These steps slow down spreading and allow the cookie structure to set before the dough flattens.

What Makes Cookies Thick?

When cookies bake, two things happen at the same time.

Butter melts and the dough softens.

Flour and eggs begin forming structure.

If the butter melts too quickly, the cookie spreads before that structure can hold it together.

Thick cookies happen when the structure sets before the cookie has time to spread too much.

The 6 Key Secrets to Thick Cookies

1. Use Cool or Cold Butter

Butter that is too soft melts quickly in the oven and causes cookies to spread.

Using slightly cool butter slows that process down.

Tip: If your dough feels soft, chill it before baking.

2. Chill the Dough

Chilling dough is one of the easiest ways to get thicker cookies.

Cold dough spreads more slowly, giving the cookie time to set.

Tip: Chill dough for at least 30–60 minutes.

3. Measure Flour Correctly

Flour provides structure.

Too little flour = cookies spread more.

Tip: Use the spoon-and-level method instead of scooping directly from the bag.

4. Use Larger Dough Balls

Larger cookies naturally stay thicker in the center.

Smaller cookies spread faster and bake flatter.

Tip: Use larger scoops (4–5 oz) for bakery-style cookies.

5. Bake on Cool Pans

Warm baking sheets can start melting butter before cookies even go into the oven.

Tip: Let pans cool completely between batches.

6. Don’t Overmix the Dough

Overmixing can weaken the structure of your dough.

Tip: Mix just until ingredients are combined.

7. Mix-Ins Matter More Than You Think

This is one of the most overlooked factors in baking thick cookies.

Mix-ins like chocolate chips, chunks, and nuts don’t just add flavor—they actually help control how cookies spread.

Why Mix-Ins Affect Cookie Thickness

As cookies bake, the dough softens and spreads outward.

Mix-ins act like structure points inside the dough, helping slow down that spread.

Think of them as small barriers that help the cookie hold its shape.

How Mix-Ins Help Create Thick Cookies

  • They add bulk and structure to the dough
  • They help hold the cookie together as it bakes
  • They reduce how far the dough can spread
  • They create that chunky bakery-style texture

This is one of the reasons bakery cookies look thick and loaded.

The Biggest Mistake With Mix-Ins

Not using enough.

Dough with too few mix-ins behaves more like plain dough and spreads more easily.

How to Use Mix-Ins for Thick Cookies

  • Use generous amounts of chocolate chips or chunks
  • Choose larger mix-ins (chunks work better than mini chips)
  • Distribute evenly throughout the dough
  • Press extra mix-ins on top before baking

Best Mix-Ins for Thick Cookies

  • chocolate chunks
  • chocolate chips
  • chopped chocolate bars
  • nuts
  • freeze-dried fruit

Quick Tip

More mix-ins = more structure = thicker cookies

Pro Baker Tips for Thick Cookies

  • bake one tray at a time
  • rotate the pan halfway through baking
  • use parchment paper
  • slightly underbake for soft centers

Common Mistakes That Make Cookies Flat

  • butter that is too soft
  • not chilling the dough
  • too much sugar
  • not enough flour

If you want a full breakdown of why cookies spread, read:

Troubleshooting

Why are my cookies still flat?

Your dough may still be too warm or you may need slightly more flour.

Why aren’t my cookies thick in the center?

Your dough balls may be too small.

Why do bakery cookies stay thick?

They use chilled dough, larger portions, and balanced ingredient ratios.

Just remember, Anyone can learn how to bake

Thick cookies aren’t complicated once you understand what controls spreading.

Small changes like chilling your dough, measuring ingredients carefully, and even using the right amount of mix-ins can completely transform your results.

Once you start controlling these factors, you’ll be able to bake thick, bakery-style cookies consistently at home.

Why Cookies Spread Too Much (And How to Fix It)

spreading cookies

Few things are more disappointing than pulling a tray of cookies out of the oven and seeing they have spread out into nothing but thin, flat cookie pancakes instead of thick bakery-style cookies.

You started with a scoop of beautiful dough, but somewhere during baking the cookies spread across the pan and lost their shape.

If this has happened to you, you’re definitely not alone. Cookie spreading is one of the most common baking problems home bakers run into.

The good news is that cookies usually spread for very predictable reasons. Once you understand what causes it, you can control the results much more easily.

In this guide we’ll break down why cookies spread, what causes it, and simple ways to fix it so you can bake thicker, better cookies every time.


The Short Answer: Why Cookies Spread

Cookies spread when the butter melts before the cookie structure sets in the oven.

When this happens, the dough softens too quickly and the cookie flattens out before the flour and eggs can hold it together.

The most common causes are:

• butter that is too soft

• too little flour

• too much sugar

• warm baking sheets

• dough that hasn’t been chilled

The good news is that most spreading issues are easy to fix with a few small adjustments.


Fast Fix Checklist

If your cookies keep spreading, try these quick fixes first:

• use slightly cool butter instead of very soft butter

• chill cookie dough before baking

• measure flour carefully

• bake cookies on cool baking sheets

• avoid over-creaming butter and sugar

Even one of these changes can make a big difference in how your cookies bake.


What Cookie Spread Actually Means

When cookies bake, two important things happen at the same time.

First, the butter begins to melt and the dough softens.

At the same time, the flour and eggs begin forming the structure that holds the cookie together.

If the butter melts too quickly, the dough relaxes and spreads outward before the structure has time to set.

This is why some cookies turn out thin and flat while others stay thick and soft.

Controlling cookie spread is really about balancing those two processes.

Quick Cookie Troubleshooting Chart

The 7 Most Common Reasons Cookies Spread

Let’s look at the most common reasons cookies spread too much and how to fix them.

1. Butter That Is Too Soft

Butter temperature has a huge impact on cookie texture.

If butter is very soft or partially melted before baking, it will melt extremely quickly in the oven. This causes the dough to collapse and spread outward.

How to fix it

Use butter that is slightly cool to the touch rather than very soft.

You can also chill your cookie dough for 30–60 minutes before baking to help slow down the melting process.

2. Too Much Sugar

Sugar melts and liquifies when heated.

When there is too much sugar in the dough, the cookie becomes softer as it bakes and spreads more easily across the pan.

This is why recipes with higher sugar content often produce thinner, crispier cookies.

How to fix it

Follow recipe measurements carefully and avoid adding extra sugar.

Balancing brown sugar and white sugar properly can also help create thicker cookies.

3. Not Enough Flour

Flour provides the structure that holds cookies together.

If there isn’t enough flour in the dough, the cookie will have a hard time maintaining its shape as the butter melts.

How to fix it

Make sure flour is measured correctly.

The best way to measure flour is to:

• spoon flour into the measuring cup

• level it off with a knife

Avoid scooping directly from the bag, which can pack in too much or too little flour.

4. Dough That Is Too Warm

Warm dough spreads much faster in the oven.

If the dough has been sitting out or the kitchen is warm, the butter inside the dough may already be starting to soften.

How to fix it

Chill the dough before baking.

Even 30 minutes in the refrigerator can help the cookies hold their shape better during baking.

5. Baking on Hot Pans

This one surprises a lot of bakers.

If you reuse a baking sheet right after removing a batch of cookies, the pan may still be warm.

When fresh dough is placed on a warm pan, the butter begins melting immediately.

How to fix it

Allow baking sheets to cool completely between batches.

Using multiple baking sheets can make this much easier.

6. Too Much Fat in the Dough

Fat makes cookies tender and flavorful, but too much can weaken the structure.

Excess butter or oil can cause cookies to spread quickly during baking.

How to fix it

Measure butter carefully and follow the recipe ratios closely.

7. Overmixing the Dough

Overmixing can affect the structure of cookie dough.

Mixing too much can break down the dough and create a texture that spreads unevenly.

How to fix it

Mix the dough only until the ingredients are combined.

Once flour is incorporated, stop mixing.


How to Prevent Cookies From Spreading

If you want thick, bakery-style cookies, these tips can help.

• start with slightly cool dough

• chill cookie dough before baking

• measure flour carefully

• bake on cool baking sheets

• use parchment paper for even baking

Small changes like these can dramatically improve cookie texture.

My Favorite Trick for Thick Cookies

One of the easiest ways to create thicker cookies is to use larger dough balls.

Bigger portions take longer to spread, which allows the center of the cookie to stay soft and thick.

This technique is often used by bakeries to create those thick, chewy cookies with soft centers.

Cookie Spread Troubleshooting

If your cookies are spreading, this quick guide may help.

Flat cookies ——> Butter may be too warm or dough not chilled.

Greasy cookies ——> Too much fat in the recipe.

Thin crispy cookies ——> High sugar content or too little flour.

Uneven spreading ——> Baking sheets may be warm.

5 Simple Tips for Better Cookies

• weigh ingredients when possible

• bake one tray at a time

• rotate pans halfway through baking

• use parchment paper for even baking

• allow cookies to cool on the pan before moving them

These small habits can improve cookie results significantly.

Why do my cookies spread even after chilling?

If cookies still spread after chilling, the dough may contain too much sugar or not enough flour.

Can I fix cookies that spread too much?

If cookies spread during baking, you can sometimes reshape them using a round cookie cutter while they are still warm.

Does baking soda affect cookie spread?

Yes. Baking soda helps cookies rise and spread slightly. Too much baking soda can cause excessive spreading.

Why do bakery cookies stay thick?

Many bakeries use chilled dough, larger dough balls, and carefully balanced ingredient ratios to control spreading.

Cookie spread can feel frustrating, especially when you’re hoping for thick, bakery-style cookies.

But the truth is that cookie spreading usually comes down to just a few simple factors like butter temperature, flour measurements, and dough temperature.

Once you understand how these elements affect your dough, it becomes much easier to bake cookies that hold their shape and turn out exactly the way you want.

With a few small adjustments, you’ll be able to turn those flat cookie pancakes into thick, delicious cookies every time. 🍪